 |
| Click picture to enlarge image |
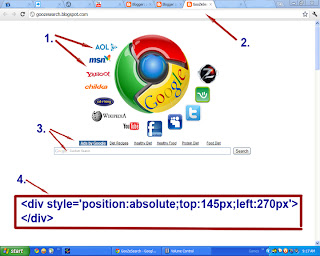
1. Wondering how I made these photos got arranged to the desired x and y axis?
In this tutorial you will learn:
• To position your photos anywhere on the page:
• Create a floating background
• Give your blog a more professional look
• Impress your visitors with personalized lay-out
2. A personalized homepage I made with Blogger.com
• Template: Simple or any template that has a white based background; you can customize it anyway you want.
3. I put a google search box and published random advertisement
4. This is the only code you'll need;copy it manually.
5. Wondering how I delete the Blogger's NAVBAR? click here
6. You don't need to delete the header unless you want to change the background color . . . click here to learn how to delete the blogger header!
Next step: Using the HTML Code into Action......
 |
| click picture to enlarge image |
7. Click on the Design Tab
8. Click on Edit HTML sub-tab
9. Press "Ctrl+F" to pop-up the Search Menu Bar;
10. Paste the HTML Code right immediately below the body of the website
11. Highlighted in yellow are the HTML code you need to control navigate the photos
12. Highlighted in green are the HTML of your url link and image source.
13. You can change the value/numbers to control the distance from TOP and the distance from LEFT.
• After changing the value click preview button to see if you hit the right spot; if not try and try to experiment until you navigate the image/ photo to your desired place.
14. This is very easy and fun. And the results are very spectacular. Good Luck!
No comments:
Post a Comment